Reading meteorological parameters through a weather station connected to the Internet has gained great popularity. Here’s an example of how to set up a weather station, connect it to ThingSpeak and display the time series. We use the inexpensive and very popular Smart Weather Station from Netatmo in this experiment.
The Internet of Things (IoT), after being introduced by Kevin Ashton of Proctor & Gamble in 1999, has become a buzzword in the last few years. The IoT describes the networking of physically real objects, usually equipped with a number of sensors and an Internet interface, and virtual objects, usually software on a computer. Measured values are recorded, processed and used to control processes without human intervention. The best known application of the IoT are smart homes, where sensors for brightness, room temperature and other parameters control processes such as switching on the lighting or the heating.
For exercise purposes, reading meteorological parameters through a weather station connected to the Internet has gained great popularity. This example is also used in a tutorial of the IoT platform ThingSpeak, originally launched by ioBridge in 2010 and having integrated support from MATLAB. Weather data (including wind speed, precipitation, temperature, humidity and light) from a MathWorks weather station in Natick MA is used here and is freely accessible. The ThingSpeak tutorial collects the temperature and humidity data from the station, calculates the dew point in real time and displays the result, together with temperature and humidity, in a plot.
It is advisable to go through this, or any other ThingsSpeak tutorial in the MATLAB documentation to understand the IoT basics, before working on the following experiment. Instead of using the data from a public weather station such as the one run by MathWorks we use our own, inexpensive and very popular weather station, the Smart Weather Station from Netatmo. As with most other weather stations in the price range below 200 Euros, the Netatmo data is also provided via a weather server. In this case, the weather server is made available free of charge by the manufacturer and does not require a paid subscription as with other manufacturers. In addition, the raw data can be accessed very easily, either via a download from the dashboard of the personal Netatmo page or via an application programming interface (API).
We use the Netatmo Smart Weather Station because it offers free access to a weather server, the possibility to download the raw data of the weather station and an application programming interface (API) for access from other platforms. The basic package of the weather station comes with an indoor and an outdoor module for measuring temperature, humidity, air pressure, CO2 concentration and noise level. There are also modules available to measure precipitation and wind speed and direction. Create a user account on the Netatmo webpage, connect your weather station to your WiFi network and register your weather station on the manufacturer’s webpage.
Logon to the Netatmo connect webpage and create a free app with Netatmo. There you need to enter an app name, a description of the project and the data protection officer name and email address (e.g. your name and your email address). After clicking the terms and conditions agreement checkbox you will get a client ID and client secret, both required to create a token to access the weather data from the weather server in your MATLAB script. Run the MATLAB script described below to access and display the data.
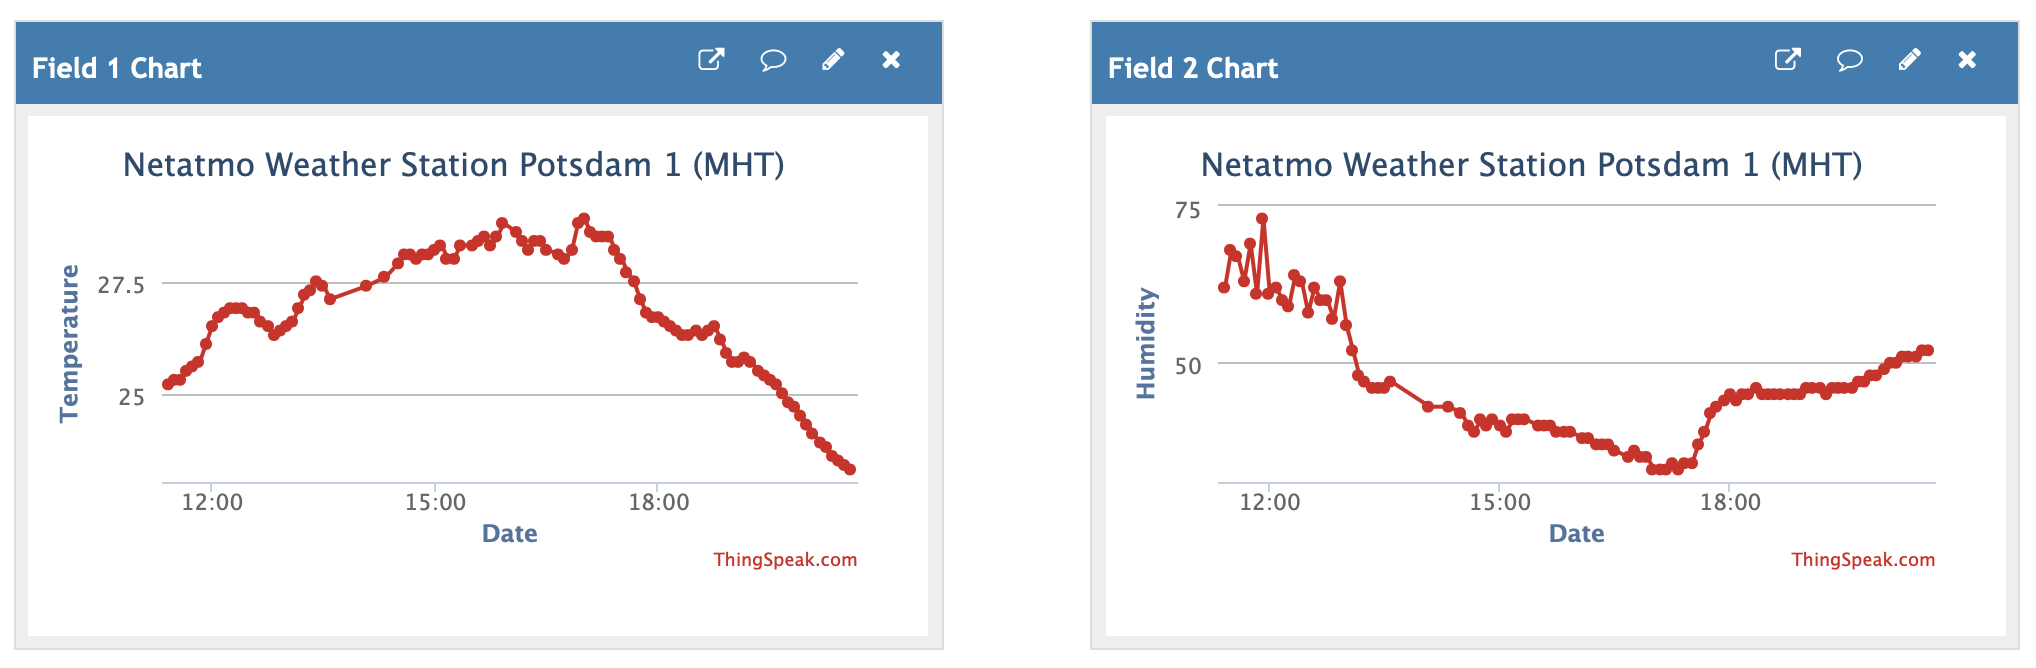
Logon to the ThingSpeak webpage and create a new channel with a channel Name and a Channel ID. Use the Channel Settings tab to define the variables to be display, e.g. Temperature and Humidity. Save the channel by pushing the green button at the end of the page. Use the API Key tab to access the Write API Key. Then you select the Apps button at the top of the page, push the MATLAB Analysis button and create a new app (e.g. Get Netatmo Data) by pushing the New button.
Paste the MATLAB script into the MATLAB Code field, enter the required information about your Netatmo login and password, the Netatmo App client ID and client secret, the ThingSpeak Channel ID and the Write API Key from above, and the media access control address (MAC address) of your Netatmo modules, and push the Save and Run button. From the Schedule Actions we select the TimeControl option, define the frequency (e.g. recurring), Recurrence (e.g. minute) and Every (e.g. 5 minutes), then define Action (e.g. MATLAB Analysis) and Code to execute (e.g. Get Netatmo Data), then push the Save button. The app then runs every 5 minutes, the it downloads and displays the data in the channel.
Download MATLAB Script to be used with ThingSpeak.
References
Bleeck S (2020) Netatmo weather station data download, MATLAB Central File Exchange. Retrieved July 16, 2020 (available online)